There are few things quite as irritating to the music lover as background noise — it’s even worse when the annoying hum comes from the speakers of your turntable setup.
So how do you stop turntables from humming? The common answer is that you need to ground it.
We have some good news for you: it’s a very straightforward process. In this guide, we’ll show you how to ground a turntable in 6 easy steps. We’ll also help you get to know your beloved turntable better by taking you around the various parts that need attention and explaining what they do.
Let’s get started.
Skip to the step-by-step guide
Grounding 101: Glossary of Terms
So what is “grounding” anyway? Does it have anything to do with protecting against lightning strikes? The answer is yes, but at a much, much less intense level. Below, we’ll cover some key terms and definitions.
- Ground: This term denotes the point in a circuit from which voltages are measured. It doesn’t necessarily suggest a direct connection to earth but rather a system’s reference point for zero volts. Essentially, a grounded point is where electricity is supposed to go to escape in the event of a fault.
- Ground loop: The ground loop is the annoying hum heard in your speakers we mentioned earlier. It happens when two pieces of equipment (i.e., your turntable and your amplifier) are separately connected to the ground but interact with each other using electrical wires. This scenario can present electricity with multiple routes to the ground, which can cause irregular flow in the loop.
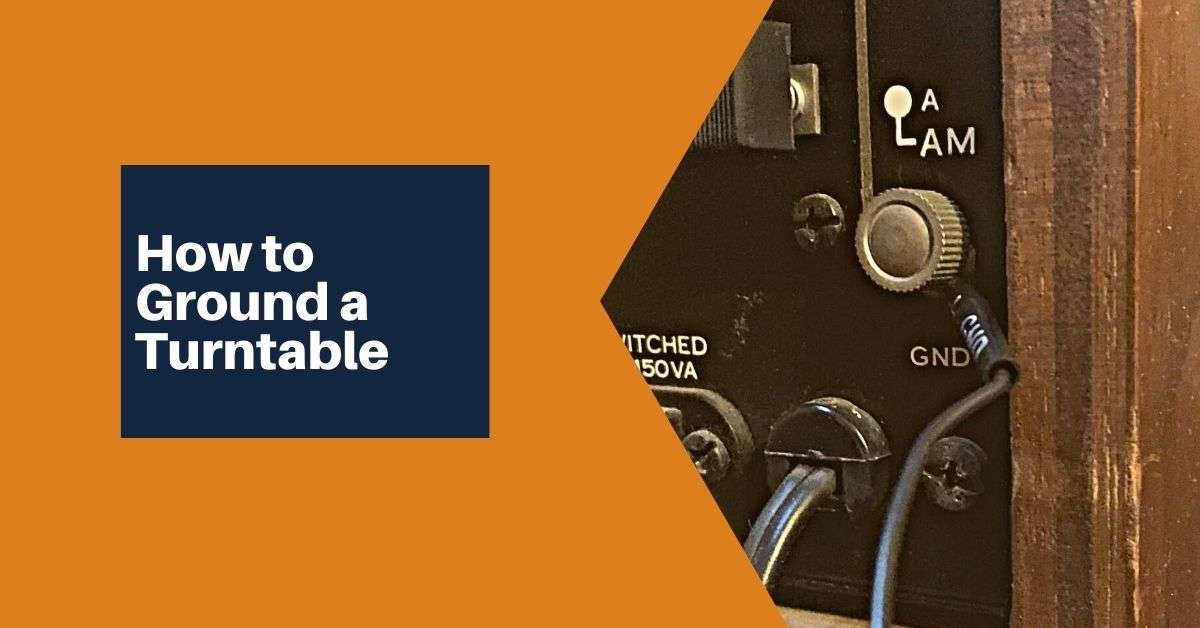
- Ground terminal: The grounding terminal is the system’s physical reference point for zero volts, so it’s where electricity needs to go if you want to reduce the hum. A Grounding terminal looks like a small metal post on the backside of your amplifier’s chassis.
- Ground wire: The grounding wire is the wire that connects equipment to a consistent grounding terminal.
- Spade connector: These are popular electrical connections at the end of the grounding wire. These are easily identified by their often copper spade which looks like a horseshoe. This makes them ideal for attaching multiple wires to the grounding terminal at once.
We’ll refer to these terms throughout the rest of our guide, so make sure you understand them well before proceeding. Ten minutes of technical jargon is worth it for a lifetime without background humming.
Why Do You Need to Ground a Turntable?
Grounding a turntable as soon as you set it up is a precautionary step. Many people prefer this option, as it means you don’t have to go through the hassle of learning how to ground a turntable later on.
However, many amateur record enthusiasts don’t realize that this problem is coming their way. But it’s all fine: the feedback doesn’t really damage your equipment, especially if you address it straight away. However, if you notice that irritating humming noise, it’s time to address it— the alternative is accepting life with annoying feedback every time you listen to music. We know you don’t want that.
How Do I Stop My Turntable Humming?
Your turntable is humming because the electricity in your equipment has multiple paths to the ground. These circumstances cause some disruption in the flow and create that humming noise, which is called a ground loop.
This loop is irritating, especially because one of the reasons we love our turntable is the cleanliness of its sound. The solution is fairly straightforward and long-lasting (as long as you don’t disrupt the ground wire in the future). Before you start making the fix, you need to make sure that the problem is what you think it is — there’s more than one reason a turntable can start humming, such as a dirty turntable cartridge needle.
Identify the Humming: 60Hz or 120Hz?
The best way to tell what’s causing your audio woes is by listening to the sound. This process may seem a bit self-explanatory, but you must identify the type of sound:
- A low, slow hum: You may be able to detect the relatively gentle “pulse” of the sound. The sound is deep and fairly mellow.
- A high-pitched, aggressive hum: This hum sounds a bit like a wasp in a jar. Its pulse will be far harder to identify, and it’s close to a buzzing sound.
The first sound is at 60Hz, while the second is at 120Hz.
What Is Making My Turntable Hum?
The 60Hz hum typically occurs because of a faulty input — i.e., a problematic connection between a wire head and a socket. It tends to get louder as you increase the volume on your system. You should test all your inputs to find out which component is causing the hum.
If the hum is at 120Hz, the problem is often caused by a ground loop. It’s worth testing a few different input combinations because if you also have an input problem, you may be hearing 60Hz and 120Hz at the same time. You can do a bit of quality-checking on your equipment while you identify whether you have a loop issue.
In electrical equipment, and especially with audio equipment, the “release” for electricity that can’t find a neat path to earth is that it feeds back as sound energy. You’ll need to ground your turntable if you’re getting feedback of this kind.
My Record Player is Humming – Why?
If you have an all-in-one record player, this guide is not for you. Record players and turntables are fundamentally different pieces of equipment. That’s not to say that your record player isn’t experiencing a grounding issue, but this guide will not be able to help you if it is.
How Do You Ground a Turntable? — A Step-by-Step Guide
Now that you know why the problem is happening, let’s address it:
Step 1: Safety First: Turn Off the Power

There’s very little risk in this process, but why not follow a few safety protocols?
Turn off the power to your turntable and amplifier. It’s also a good idea to disconnect your entire system from any outlets just to be safe.
Step 2: Find the Turntable’s Ground Wire

There’s very little risk in this process, but why not follow a few safety protocols? Turn off the power to your turntable and amplifier. It’s
You can locate the grounding wire on the underside of your turntable. You’ll be able to identify it by its copper spade which has a distinctive U-shaped protrusion.
You may find the grounding wire folded up, so unfold it and check how long it is. If the wire isn’t long enough to connect to the terminal on the amplifier (or if there’s no wire at all), you can connect it to an extra length of wire. See step number four for more details.
Step 3: Find the Grounding Terminal on the Amplifier

There’s very little risk in this process, but why not follow a few safety
The grounding terminal is one of the chassis connections on the back of your amplifier. It’s pretty easy to spot, as it’s typically marked “ground.” It’s often a metal post with a screw terminal, so you’ll have to loosen it to apply the unconnected copper spade of your grounding wire.
If you can’t find the terminal on your amplifier, it’s not a big deal. You can connect the ground wire to the metal chassis of the amplifier. It’s not ideal, but it’ll work just fine.
Pro tip: If you’re shopping for a new amplifier, check if it has a terminal on the back before purchasing it.
Step 4: Determine If You Need More Wire

At this point in the process, you may realize that your setup is too far apart for the wire to reach. If you’ve found yourself in this situation (or you discover there’s no ground wire at all), you’ll have to use your own. You’ll need to following items to proceed:
- Needle-nose pliers
- Several feet of 18-20 gauge stranded wire
- Electrical Tape
- Optional: Soldering iron
Select the length of wire you need. If you’re lengthening an existing wire coming from your turntable, you’ll need to use your pliers to strip the casing before twisting or soldering the two wires together. You can then seal them tightly with gaffer tape.
If there was no starting wire at all, strip the casing from the end of a wire length and attach it to your turntable, preferably to a screw on the base. Cover the joint with gaffer tape. This process is grounding a turntable DIY style.
Step 5: Connect the Ground Wire to the Grounding Terminal

If your amplifier has a ground terminal, attach the wire to the terminal using the spade connector and screw it back in gently.
If it doesn’t have a terminal, you can use electrical tape to attach the spade connector to the metal chassis of the amplifier — try to place it away from the speaker.
You can attach a homemade wire to a screw on the amplifier, preferably away from the speaker, just like with the turntable.
Step 6: Check for Faults

If you’re using an improvised setup, you may need to try attaching the wires to different points on your turntable and amplifier to achieve the best results. However, most turntables come with a ground wire, and most amplifiers come with a terminal. So, you’ll rarely come across issues.
Once you’ve completed the process, turn the power on and listen closely for any residual hum noises. If you’re still experiencing problems, double-check your work. Otherwise, congratulations: you beat the hum!
How to Ground a Turntable Without a Ground Wire?
So what if your turntable has no grounding wire attached to it? Don’t worry, with a few household tools and about 10 minutes, you can attach a ground wire to your turntable!
- First, pick up around 5 feet (around 1.5 meters) or 18 or 20 gauge wire. This can usually be found at any local hardware store.
- With wire strippers, pliers, or a knife, strip about a half-inch (~12 mm) of insulation off each end of the wire.
- Attach one end to your amplifier’s chassis. Try to find a small screw on the back or bottom to loosen, then twirl the wire around and re-righten.
- Repeat step 3 for your turntable, finding a screw of the body and attaching the other end of the wire to it.
That’s it, simple and easy!
Final Thoughts — Learning How to Ground a Turntable

Don’t suffer in silence. Revel in that lack of background noise.
You bought your turntable to enjoy your favorite music to its fullest. Learning a few simple tricks like how to ground a turntable can help you so much, even if you have to go the DIY route. It adds that “personal” touch that only enhances the aesthetic. Enjoy!

Lead Editor / Owner
After beginning his career in the video and audio recording industry, Andrew started HiFi Hippo to share his knowledge and passion for vinyl and vintage audio with other readers.
